Not seeing much success from your top of the funnel social media ads? It might be time to delve into the world of remarketing, with the help of Facebook Pixel.
If you haven’t heard of the Facebook Pixel before, it’s essentially a snippet of code that you can install on your website and/or app to monitor and track users’ actions. If they visit a specific page or add a product to their basket, you’ll know about it!
It’s a simple process to set it up, with the possibility to add custom events to track specific actions that are valuable to your business. If you don’t feel comfortable setting up your own Pixel (HTML, what?), you can send instructions to your Developer who will be able to get you up and running in no time.
Please note that you won’t be able to set up ads seconds after implementing the Facebook Pixel as you will not have enough data to create a custom audience. The more data you have, the bigger your audience and the better chance of success you will have with your campaigns.
Benefits of Facebook Pixel
So you’ve set up your Facebook Pixel and got tons of data to filter through, but what can you actually do with this information?
While everyone with a Facebook Page can access the ‘Awareness’ and ‘Consideration’ objectives in Ads Manager, only businesses with Facebook Pixel can run ‘Conversion’ campaigns.
Ad campaigns with the ‘Conversion’ objective will allow you to track anything from a prospect signing up for an email newsletter to a returning customer making another purchase.
Engaging with social media users who have already shown an interest in your business, such as visiting your website, is far easier than introducing your business to a brand new person.
Did you know that it actually costs five times as much to attract a new customer than to keep an existing one
The power of retention marketing speaks for itself but the trick to getting clever with your remarketing ad campaigns isn’t in the creative, but how you segment your audience based on the information Pixel gives you.
In order to fully optimise your ads using Facebook Pixel data, you must create custom audiences. Some examples of audiences you might want to experiment with are:
- People who have visited a specific page, such as an event or product page
- People who have recently visited in the last 24 hours
- People who haven’t visited your website in a while, such as the last 14 days
- People who have added products to their cart but made no purchase
Setting up Custom Audiences
Step 1
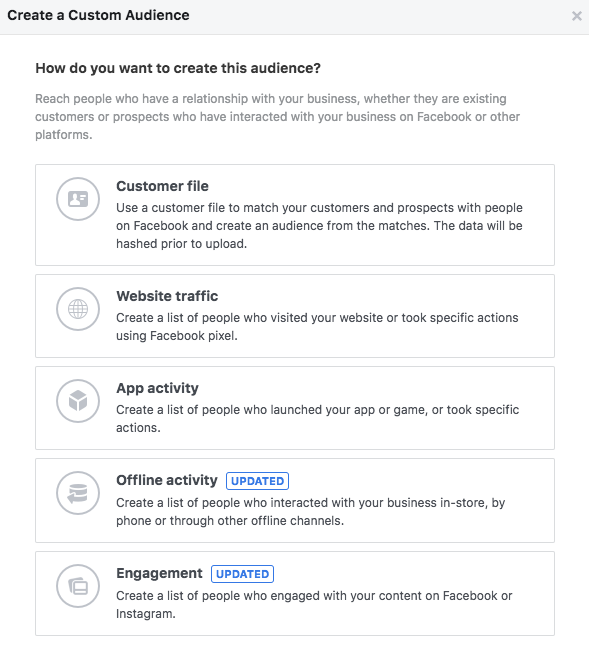
Go to Audiences.
Step 2

For this example, we will set up an audience using ‘website traffic’. However, if you have app data that you want to use, you can choose ‘app activity’ instead.
Step 3
![]()
Think about the type of people you want to target. You can choose to segment by:
- All website visitors
- People who visited specific web pages
- Visitors by time spent
- Events
You can also exclude specific people - for example, you may want to include people who have ‘added to cart’ but exclude people who have ‘made a purchase’ as this will allow you to target customers with abandoned carts.
Step 4
![]()
If you have selected multiple criteria in the previous step, you can choose to include people who meet ‘any’ of the steps or ‘all’ of them.
Step 5
Give your audience a name that is easily recognisable, as you will need to be able to find it when you set up your campaign in Ads Manager.
Once you’ve set up a custom audience, it will continuously update as new data is tracked on your website/app.
Every stage of the ad creation process will be the same as usual, choosing an objective, assigning a budget and designing your creative. The only difference is you will be able to add your custom audience, created from your Facebook Pixel data, when defining who you want to show your ad to.
Need more assistance with remarketing? Or maybe need some help setting up Facebook Pixel? Give the Thrive team a call on 01325 778 786 to arrange a meeting where we can discuss your requirements over a cuppa!