From ‘slay’ to ‘shook’, Gen Z has come up with a variety of newfound slang for the 21st century and we can now add ‘finsta’ to the list.
You’re probably already familiar with the social media platform, Instagram. But what on earth is a ‘finsta’? Well, here’s a quick breakdown of the latest digital phenomenon…
Nowadays, everyone knows that whatever is put on online, stays online. Nothing is safe once it’s on the internet and that’s why it’s never been more crucial to be mindful of what you’re sharing and the implications it could have with family, friends and your business relationships.
If you’re a young professional starting out in the business world, the first thing employers, clients or customers may do is check your personal social media. Sipping a cocktail in front of an ‘Insta-worthy’ bar? That’s fine. However, if you’re posting drunk selfies you’re going to give a bad impression if the picture falls into the wrong hands. That’s where your ‘finsta’ comes in and works its magic!
A ‘finsta’ is a combination of the words ‘fake’ and ‘Insta’ in which users post anything they wouldn’t want to share on their main account such as selfies, memes, etc.
While your main Instagram or ‘rinsta’ is your highlight reel - dedicated to photos of you living your best life, your ‘finsta’ shares the good, the bad and the ugly (selfies). The irony is that the content you post on your ‘finsta’ will be more realistic and relatable than your main account. However, you’ll only want a handful of people, like close friends, to access your ‘finsta’.
In order to protect your personal brand, you’ll need to set up a ‘finsta’ correctly so as to keep it private and safe.
How Do I Set up a Finsta?
Step 1
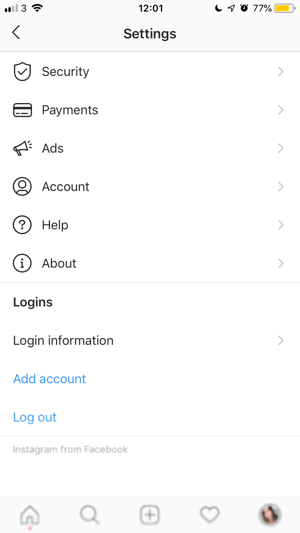
On your real Instagram account, click on the hamburger icon. At the bottom of Settings, select ‘Add Account’.
Step 2
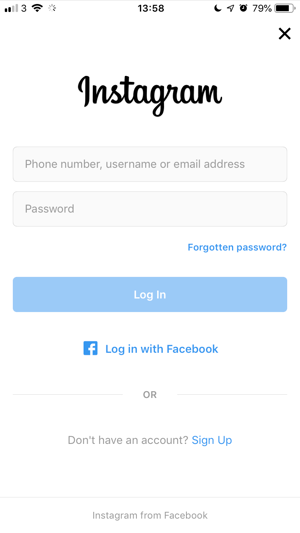
You will now be taken to the ‘log in’ screen, choose to ‘sign up’.
Step 3
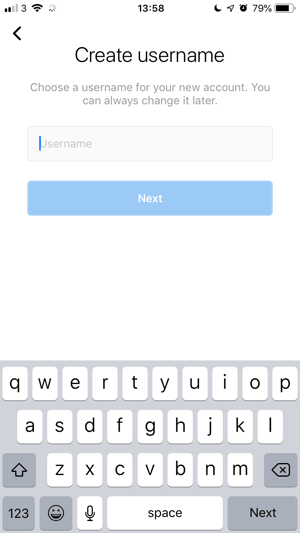
You will now need to pick a unique username that won’t be specifically attributed to you - stay away from your name, consider hobbies or interests instead. Don’t worry too much at this stage as you can change it later if needed.
Step 4
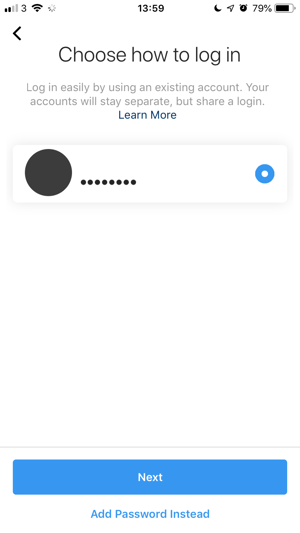
After this, you will be asked how you would like to log in. You can choose to use an existing account (your real Instagram) and your accounts - ‘rinsta’ and ‘finsta’ - will be separate but will share a login. Otherwise, you can choose a completely different password instead.
Step 5
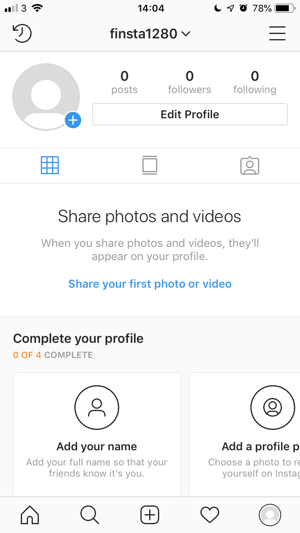
You’re nearly set up! Add a profile photo, name and bio to bring your ‘finsta’ together.
Step 6
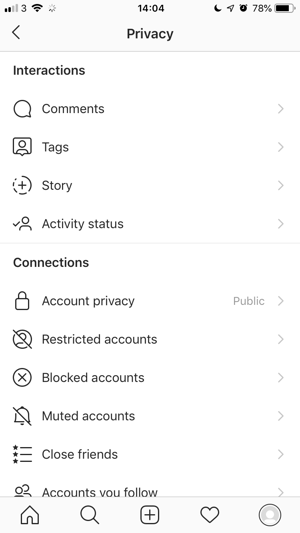
The last thing you need to do is change the privacy of your account to private. Click the hamburger icon and go into your Settings. Choose ‘Privacy’ and toggle the ‘Account Privacy’ setting from ‘Public’ to ‘Private’.
Instagram now allows you to be signed into multiple accounts at the same time meaning that you can easily swap between your ‘rinsta’ and ‘finsta’ with ease.
Now you can focus on defining who will have access to each account. Request your closest friends and let them see the real you on your ‘finsta’. This means you can keep posting your ‘rinsta-friendly’ photos on your main account, protecting your personal brand meanwhile getting the thumbs up from your mum, your old school friends and your boss.